


CloudFront + S3 + Cognito to create a sign-in screen
We have confirmed the CloudFront + S3 configuration in “How to create a React SPA with CloudFront + S3“. This time, we would like to add a sign-in screen with Cognito.
The sign-in screen can be realized by creating a user pool in AWS Cognito.
Create a user pool

Click on “Create User Pool.”

Click on “Follow the Steps to Setup.”

Make sure you sign in with your “username.”

Check “email” for the standard attribute. Click “Next Step.”

Leave the password strength as default and click “Next Step”.

Disable multi-factor authentication (MFA). Click “Next Step” without creating a new role name.

For “Verification Type,” select “Code. Click “Next Step.

Click on “Next Steps.”

Click on “Next Steps.”

Enter an appropriate name in the “App Client Name” field.
Uncheck “Create Client Secret.
Click “Create App Client.

Click on “Next Steps.”

Click on “Next Steps.”

Click on “Create Pool.”

Note down the “Pool ID” as it will be used later. This completes the creation of the user pool.
Create an identity pool with federated identities
Next, create an ID pool.

Here, the ID pool name is “my_app_name”.

The authentication provider is “Cognito” and the user pool ID and application client ID are entered. *These are displayed when the user pool is created.
Click “Create Pool.”

Click “Allow.” This completes the creation of the ID pool.

Sample code will be displayed, this time JS sample code. Copy this and use it on the sign-in screen.
Create a sign-in screen
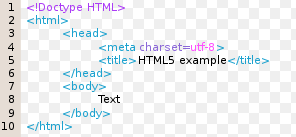
index.html and js are placed in S3.
In this case, they will be placed on the web server for convenience.
Required Libraries
- aws-cognito-sdk.js
- amazon-cognito-identity.js
- aws-sdk.js
Download “amazon-cognito-identity-js“, in which aws-cognito-sdk.js is stored.
Download “aws-amplify“, in which amazon-cognito identity.js is stored.
Download the AWS SDK from Federated Identity in the AWS Management Console.
The awk-sdk.js is stored in this file.
Creating a user

I can create a user from the user pool, but the status is “FORCE_CHANGE_PASSWORD”.
In this state, we need to create a sign-up screen and change the status to “CONFIRMED”, so we can create the user from the AWS CLI command.
$ aws cognito-idp sign-up --client-id <作成したClientId> --username user01 --password 00000000 --user-attributes
$ aws cognito-idp admin-confirm-sign-up --user-pool-id <作成したPoolId> --username user01
You can now confirm Cognito integration only on the sign-in screen.


コメント